


How to connect multiple pieces of Gypsum Board 5x5mm Square Hole?
Jan 06, 2026
Leave a message
When dealing with construction and interior design projects that require a unique aesthetic and functional element, Gypsum Board 5x5mm Square Hole is an excellent choice. As a supplier of this specialized product, I've encountered numerous inquiries about how to connect multiple pieces of this gypsum board effectively. In this blog post, I'll share some practical methods and tips to ensure a seamless connection.
Understanding the Gypsum Board 5x5mm Square Hole
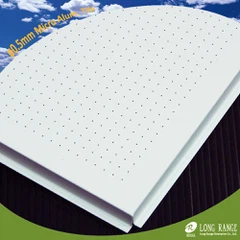
Before delving into the connection methods, it's important to understand the characteristics of the Gypsum Board 5x5mm Square Hole. This type of gypsum board is perforated with 5x5mm square holes, which not only adds an interesting visual texture but also has functional benefits such as sound absorption. The board is made from gypsum, a soft sulfate mineral composed of calcium sulfate dihydrate, which is known for its fire-resistant and lightweight properties.
Preparation
Proper preparation is crucial for a successful connection. Here are the steps you should take:
- Measure and Cut: Carefully measure the area where you'll install the gypsum boards and cut the boards to the appropriate size using a sharp utility knife. Make sure to wear safety goggles and gloves during the cutting process.
- Clean the Surfaces: Remove any dust, debris, or grease from the edges of the boards that will be joined. A clean surface ensures better adhesion.
- Gather Tools and Materials: You'll need a few tools and materials for the connection, including joint compound, drywall tape, a putty knife, and a sanding block.
Connection Methods
1. Tape and Joint Compound Method
This is the most common method for connecting drywall or gypsum boards.
- Apply Joint Compound: Use a putty knife to apply a thin layer of joint compound to the edge of one board. The joint compound acts as an adhesive and helps to fill in any gaps.
- Place the Tape: Lay a strip of drywall tape over the joint compound. Press the tape firmly into the compound, ensuring that it adheres well and is centered over the joint.
- Apply Another Layer of Joint Compound: Once the tape is in place, apply another layer of joint compound over the tape. Use the putty knife to smooth out the compound, making it flush with the surface of the boards.
- Sand the Joint: After the joint compound has dried (usually within 24 hours), use a sanding block to sand the joint until it's smooth. Be careful not to sand too aggressively, as this can damage the boards.
2. Mechanical Fasteners
For a more secure connection, you can use mechanical fasteners such as screws or nails.
- Screws: Use drywall screws that are the appropriate length for the thickness of the gypsum boards. Drill pilot holes at regular intervals along the joint to prevent the boards from cracking. Then, drive the screws into the holes, making sure they're flush with the surface of the boards.
- Nails: If using nails, choose drywall nails that are long enough to penetrate both boards. Hammer the nails into the joint at regular intervals, spacing them about 6 - 8 inches apart.
3. Adhesive Method
Adhesives can also be used to connect the gypsum boards, especially in situations where a seamless appearance is desired.


- Choose the Right Adhesive: Select an adhesive that is suitable for use with gypsum boards. Make sure it has good bonding strength and is flexible enough to accommodate any movement in the boards.
- Apply the Adhesive: Apply the adhesive to the edge of one board in a zigzag pattern. Make sure to cover the entire edge evenly.
- Join the Boards: Press the two boards together firmly, aligning them carefully. Use clamps to hold the boards in place while the adhesive dries.
Tips for a Seamless Connection
- Align the Boards Properly: Before making the connection, ensure that the boards are properly aligned. Use a level or a straightedge to check for any unevenness.
- Fill in Gaps: If there are any gaps between the boards, fill them with joint compound or caulk. This will help to create a smooth and seamless appearance.
- Sand and Prime: After the connection is complete, sand the entire surface of the boards to smooth out any rough edges or bumps. Then, apply a coat of primer to prepare the surface for painting or finishing.
Conclusion
Connecting multiple pieces of Gypsum Board 5x5mm Square Hole requires careful planning and the right techniques. Whether you choose the tape and joint compound method, mechanical fasteners, or an adhesive, following the steps outlined in this blog post will help you achieve a strong and seamless connection.
As a supplier of Gypsum Board 5x5mm Square Hole, I'm here to provide you with high-quality products and expert advice. If you're interested in purchasing our gypsum boards or have any questions about the installation process, please don't hesitate to contact us. We look forward to working with you on your next project.
References
- "Drywall Installation Guide," Home Depot.
- "Gypsum Board Handbook," National Gypsum Company.
Send Inquiry