How to install a 40mm face grid?
Sep 29, 2025
Leave a message
Hey there! As a supplier of 40mm face grids, I'm super stoked to share with you how to install a 40mm face grid. Whether you're a DIY enthusiast or a professional contractor, this guide will walk you through the process step by step.
First off, let's talk about what a 40mm face grid is. It's a type of ceiling grid that's commonly used in commercial and residential buildings. The 40mm refers to the width of the grid's face, which gives it a more substantial and robust look compared to thinner grids. It's often used in suspended ceiling systems to support ceiling tiles or panels.
What You'll Need
Before you start the installation, you'll need to gather a few tools and materials. Here's a list of what you'll typically need:
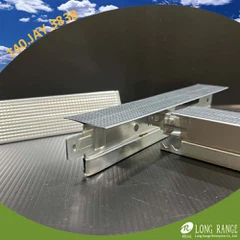
- 40mm face grid: Obviously, you'll need the grid itself. You can find a great selection of Suspended Ceiling Grid T40 Wide Face CT Jay Ends on our website.
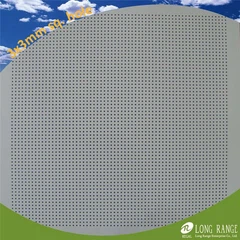
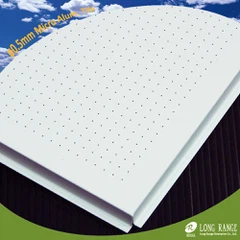
- Ceiling tiles or panels: These will fit into the grid. Make sure to choose the right size and style for your project.
- Suspension wires: These are used to hang the grid from the ceiling structure.
- Hangers: You'll need hangers to attach the grid to the suspension wires.
- Measuring tape: To measure the area where you'll be installing the grid and to ensure accurate placement.
- Level: A level is essential to make sure the grid is installed straight and even.
- Cutting tools: Such as a hacksaw or a grid cutter to cut the grid to the right length.
- Screwdriver or drill: Depending on the type of hangers you're using, you'll need a screwdriver or drill to attach them.
Step 1: Measure and Plan
The first step in any installation project is to measure the area where you'll be installing the 40mm face grid. Use a measuring tape to measure the length and width of the ceiling. Make sure to account for any obstacles, such as light fixtures or vents, that may affect the placement of the grid.
Once you have your measurements, it's time to plan the layout of the grid. Start by marking the center point of the ceiling on both the length and width. This will help you align the grid properly. You can use a chalk line or a laser level to create straight lines on the ceiling.
Step 2: Install the Suspension Wires
Next, you'll need to install the suspension wires. These wires will support the weight of the grid and the ceiling tiles. Start by attaching the suspension wires to the ceiling structure using hangers. The hangers should be spaced evenly along the chalk lines you created earlier.
Make sure the suspension wires are long enough to reach the desired height of the grid. You can adjust the length of the wires using turnbuckles or other adjustable hangers. Once the suspension wires are installed, use a level to make sure they are all at the same height.
Step 3: Assemble the Grid
Now it's time to assemble the 40mm face grid. Start by laying out the main runners on the floor. The main runners are the long pieces of grid that run parallel to each other. Connect the main runners using the appropriate connectors. Make sure the connectors are securely attached to prevent the grid from coming apart.
Once the main runners are assembled, you can start installing the cross tees. The cross tees are the shorter pieces of grid that run perpendicular to the main runners. Insert the cross tees into the slots on the main runners and make sure they are properly aligned.
Step 4: Hang the Grid
Once the grid is assembled, it's time to hang it from the suspension wires. Start by attaching the hangers to the grid at regular intervals. The hangers should be attached to the main runners and the cross tees. Make sure the hangers are securely attached to prevent the grid from sagging.
Next, lift the grid up to the suspension wires and attach it using the adjustable hangers. Use a level to make sure the grid is straight and even. Adjust the height of the grid as needed to ensure it is at the desired level.


Step 5: Install the Ceiling Tiles or Panels
Once the grid is installed, you can start installing the ceiling tiles or panels. Start by placing the tiles or panels into the grid, starting from one corner and working your way across. Make sure the tiles or panels fit snugly into the grid and are properly aligned.
If you need to cut the tiles or panels to fit around obstacles, use a sharp utility knife or a tile cutter. Make sure to measure and mark the tiles or panels accurately before cutting.
Step 6: Finish the Installation
Once all the ceiling tiles or panels are installed, you can finish the installation by trimming any excess grid or wires. Use a hacksaw or a grid cutter to cut the grid to the desired length. Make sure to clean up any debris or dust from the installation area.
Finally, take a step back and admire your work! You've successfully installed a 40mm face grid.
Tips and Tricks
- Work in a team: Installing a 40mm face grid can be a two-person job, especially when it comes to lifting and hanging the grid. Having an extra set of hands can make the installation process much easier and faster.
- Take your time: Don't rush the installation process. Make sure to measure and plan carefully to ensure a professional-looking finish.
- Use the right tools: Using the right tools for the job will make the installation process much easier and more efficient. Make sure to invest in quality tools that are designed for ceiling grid installation.
- Follow the manufacturer's instructions: Different brands and types of 40mm face grids may have slightly different installation instructions. Make sure to read and follow the manufacturer's instructions carefully to ensure a proper installation.
Contact Us for More Information
If you have any questions or need further assistance with installing a 40mm face grid, don't hesitate to contact us. We're a leading supplier of 40mm face grids and have years of experience in the industry. Our team of experts is always ready to help you with your project.
Whether you're looking for more information about our products, need advice on installation, or want to place an order, we're here to help. Just reach out to us, and we'll do our best to assist you.
References
- Ceiling Grid Installation Guide - General industry knowledge and best practices.
- Manufacturer's Instructions for 40mm Face Grids - Specific details and guidelines provided by the grid manufacturers.
Send Inquiry