


How to repair micro perforated aluminium ceiling tiles?
Jul 24, 2025
Leave a message
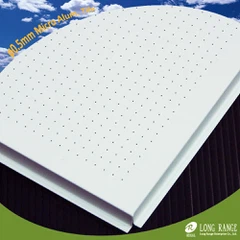
Micro perforated aluminium ceiling tiles are a popular choice for both commercial and residential spaces due to their aesthetic appeal, durability, and acoustic properties. As a supplier of Micro Perforated Aluminium Ceiling Tile, I understand the importance of maintaining these ceiling tiles to ensure they continue to perform well and look great. In this blog post, I'll share some practical tips on how to repair micro perforated aluminium ceiling tiles.
Assessing the Damage
Before you start any repair work, it's crucial to assess the extent of the damage to the ceiling tiles. Minor issues such as small scratches or dents can often be fixed easily, while more significant damage like large holes or extensive bending may require replacement of the tile.
- Scratches: Inspect the surface of the tile for any visible scratches. Light scratches can usually be buffed out, while deeper ones may need more attention.
- Dents: Check for dents on the tile. Small dents can sometimes be pushed out from the backside of the tile, while larger dents may need to be filled or the tile replaced.
- Holes: Look for any holes in the tile. Micro perforations are normal, but if there are large holes or tears, they will need to be repaired or the tile replaced.
- Bending: Examine the tile for any signs of bending or warping. Slight bending can sometimes be corrected, but severe bending may require a new tile.
Tools and Materials Needed
Once you've assessed the damage, gather the necessary tools and materials for the repair. Here's a list of items you may need:
- Safety Equipment: Safety glasses, gloves, and a dust mask to protect yourself during the repair process.
- Tools: Screwdriver, pliers, putty knife, sandpaper (fine-grit), paintbrush, and a rubber mallet.
- Materials: Aluminium filler, matching paint or finish, and replacement tiles if necessary.
Repairing Minor Scratches
Minor scratches on micro perforated aluminium ceiling tiles can often be repaired without too much hassle. Here's how:
- Clean the Area: Use a mild detergent and water to clean the scratched area. Dry it thoroughly with a clean cloth.
- Sand the Scratch: Gently sand the scratch with fine-grit sandpaper to smooth out the edges. Be careful not to sand too hard, as this could damage the tile.
- Apply Aluminium Filler: If the scratch is deeper, apply a small amount of aluminium filler to the scratch using a putty knife. Smooth it out and let it dry according to the manufacturer's instructions.
- Sand the Filled Area: Once the filler is dry, sand it lightly with fine-grit sandpaper to make it level with the surrounding tile surface.
- Apply Matching Paint or Finish: Apply a thin coat of matching paint or finish to the repaired area using a paintbrush. Let it dry completely before assessing the result. You may need to apply multiple coats for a seamless finish.
Fixing Dents
Dents in micro perforated aluminium ceiling tiles can be a bit more challenging to repair, but it's still possible with the right approach. Here's what you can do:
- Access the Backside of the Tile: If possible, remove the tile from the ceiling to access the backside. This will make it easier to work on the dent.
- Push Out the Dent: Use a rubber mallet or a similar tool to gently push out the dent from the backside of the tile. Start from the edges of the dent and work your way towards the center. Be careful not to overdo it, as this could cause the tile to bend or warp.
- Fill the Dent: If the dent is still visible after pushing it out, apply a small amount of aluminium filler to the dent using a putty knife. Smooth it out and let it dry according to the manufacturer's instructions.
- Sand and Finish: Once the filler is dry, sand it lightly with fine-grit sandpaper to make it level with the surrounding tile surface. Apply a thin coat of matching paint or finish to the repaired area using a paintbrush. Let it dry completely before reinstalling the tile.
Patching Holes
If there are holes in the micro perforated aluminium ceiling tiles, you'll need to patch them up to prevent further damage. Here's how:
- Cut a Patch: Cut a piece of aluminium sheet that is slightly larger than the hole. Make sure the patch is the same thickness as the ceiling tile.
- Clean the Area: Clean the area around the hole with a mild detergent and water. Dry it thoroughly with a clean cloth.
- Apply Adhesive: Apply a thin layer of adhesive to the backside of the patch and the area around the hole. Press the patch firmly onto the hole and hold it in place for a few minutes to allow the adhesive to bond.
- Seal the Edges: Use a putty knife to apply a small amount of aluminium filler around the edges of the patch to seal it. Smooth it out and let it dry according to the manufacturer's instructions.
- Sand and Finish: Once the filler is dry, sand it lightly with fine-grit sandpaper to make it level with the surrounding tile surface. Apply a thin coat of matching paint or finish to the repaired area using a paintbrush. Let it dry completely before assessing the result.
Replacing Damaged Tiles
In some cases, the damage to the micro perforated aluminium ceiling tile may be too severe to repair, and you'll need to replace it. Here's how:
- Remove the Damaged Tile: Use a screwdriver or pliers to remove the damaged tile from the ceiling. Be careful not to damage the surrounding tiles.
- Measure the Replacement Tile: Measure the dimensions of the damaged tile and cut a replacement tile to the same size. Make sure the replacement tile has the same perforation pattern and finish as the existing tiles.
- Install the Replacement Tile: Carefully place the replacement tile in the empty space on the ceiling and secure it in place using screws or clips. Make sure the tile is level and flush with the surrounding tiles.
- Finish the Edges: Use a putty knife to apply a small amount of aluminium filler around the edges of the replacement tile to seal it. Smooth it out and let it dry according to the manufacturer's instructions.
- Apply Matching Paint or Finish: Apply a thin coat of matching paint or finish to the replacement tile and the surrounding area using a paintbrush. Let it dry completely before assessing the result.
Preventive Maintenance
To minimize the need for repairs in the future, it's important to perform regular preventive maintenance on your micro perforated aluminium ceiling tiles. Here are some tips:
- Clean Regularly: Use a mild detergent and water to clean the ceiling tiles regularly. Avoid using abrasive cleaners or tools, as these can damage the tile surface.
- Inspect for Damage: Periodically inspect the ceiling tiles for any signs of damage, such as scratches, dents, or holes. Address any issues promptly to prevent them from getting worse.
- Avoid Impact: Be careful not to hit or damage the ceiling tiles with objects. If you're working in the area, use caution and take appropriate safety measures.
- Control Humidity: High humidity levels can cause the aluminium to corrode over time. Use a dehumidifier to control the humidity in the room and prevent moisture damage to the ceiling tiles.
Conclusion
Repairing micro perforated aluminium ceiling tiles is a manageable task that can be done with the right tools, materials, and techniques. By following the steps outlined in this blog post, you can effectively repair minor damage to your ceiling tiles and keep them looking great for years to come.


As a supplier of Micro Perforated Aluminium Ceiling Tile, we are committed to providing high-quality products and excellent customer service. If you have any questions or need further assistance with your ceiling tile repair or replacement, please don't hesitate to contact us. We'd be happy to help you with your procurement needs and discuss how our products can meet your specific requirements.
References
- "Aluminium Ceiling Tile Installation and Maintenance Guide", Manufacturer's Manual
- "DIY Home Improvement: Repairing Metal Ceiling Tiles", Home Improvement Magazine
Send Inquiry