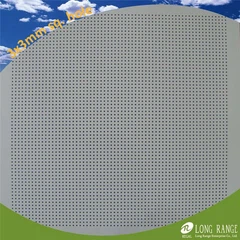
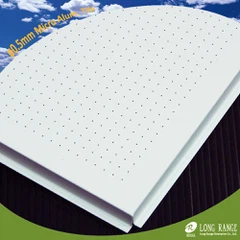
How to seal the edges of Gypsum Board 5x5mm Square Hole?
May 14, 2025
Leave a message
Hey there! As a supplier of Gypsum Board 5x5mm Square Hole, I've had my fair share of questions about how to seal the edges of these boards. It might seem like a small detail, but it can make a huge difference in the overall performance and appearance of your project. So, let's dive right in and explore the best ways to seal those edges.
Why Sealing the Edges Matters
Before we get into the how-to, let's talk about why sealing the edges of your Gypsum Board 5x5mm Square Hole is so important. First off, it helps to prevent moisture from seeping into the board. Gypsum is a porous material, and if moisture gets in, it can cause the board to swell, warp, or even develop mold. Sealing the edges acts as a barrier, keeping the moisture out and protecting the integrity of the board.
Secondly, sealing the edges can improve the aesthetic appeal of your project. It gives the board a clean, finished look, and can prevent the edges from chipping or cracking over time. This is especially important if you're using the boards in a high-traffic area or in a space where appearance matters.
Materials You'll Need
To seal the edges of your Gypsum Board 5x5mm Square Hole, you'll need a few basic materials. Here's what you should have on hand:
- Sealant: There are several types of sealants available, but for gypsum board, a flexible, waterproof sealant is usually the best choice. Silicone sealants are a popular option because they're easy to apply, adhere well to gypsum, and provide excellent waterproofing.
- Caulking Gun: This is used to apply the sealant evenly along the edges of the board. Make sure you choose a caulking gun that's comfortable to hold and easy to use.
- Utility Knife: You'll need a sharp utility knife to cut the tip of the sealant tube at the right angle and to trim any excess sealant after it's applied.
- Sandpaper: A fine-grit sandpaper can be used to smooth the edges of the board before applying the sealant. This helps the sealant adhere better and gives a more professional finish.
- Clean Cloth: You'll need a clean, dry cloth to wipe the edges of the board clean before applying the sealant. This removes any dust, dirt, or debris that could prevent the sealant from adhering properly.
Step-by-Step Guide to Sealing the Edges
Now that you have all the materials you need, let's walk through the process of sealing the edges of your Gypsum Board 5x5mm Square Hole.
Step 1: Prepare the Board
Start by inspecting the edges of the board for any damage or rough spots. If you find any, use the sandpaper to smooth them out. This will help the sealant adhere better and give a more even finish. Once the edges are smooth, use the clean cloth to wipe them clean, removing any dust or debris.
Step 2: Cut the Sealant Tube
Take the sealant tube and cut the tip at a 45-degree angle. The size of the opening will depend on the width of the edge you're sealing. For a 5x5mm square hole board, a small opening (about 1/8 inch) should be sufficient.

Step 3: Load the Caulking Gun
Insert the sealant tube into the caulking gun and push the plunger all the way in to secure it. Make sure the gun is loaded correctly and that the sealant is ready to be applied.
Step 4: Apply the Sealant
Hold the caulking gun at a 45-degree angle to the edge of the board and start applying the sealant. Apply a steady, even bead of sealant along the entire length of the edge. Make sure the sealant fills the gap between the board and any adjacent surfaces, such as walls or other boards.
Step 5: Smooth the Sealant
After applying the sealant, use a putty knife or your finger to smooth it out. This helps to remove any air bubbles and gives the sealant a more professional finish. Work quickly, as most sealants start to dry within a few minutes.
Step 6: Trim the Excess Sealant
Once the sealant is smooth, use the utility knife to trim any excess sealant. Cut it flush with the edge of the board for a clean, finished look.

Step 7: Let the Sealant Dry
Allow the sealant to dry completely according to the manufacturer's instructions. This usually takes a few hours, but it can take longer in humid conditions. Avoid touching or disturbing the sealant while it's drying.
Tips and Tricks
Here are a few tips and tricks to help you get the best results when sealing the edges of your Gypsum Board 5x5mm Square Hole:

- Choose the Right Sealant: Make sure you choose a sealant that's compatible with gypsum board and suitable for the environment where the board will be installed. For example, if the board will be exposed to moisture, choose a waterproof sealant.
- Work in a Well-Ventilated Area: Sealants can emit strong fumes, so it's important to work in a well-ventilated area. Open windows and doors to allow fresh air to circulate.
- Practice on a Scrap Piece: If you're new to using a caulking gun, it's a good idea to practice on a scrap piece of gypsum board first. This will help you get the hang of applying the sealant evenly and smoothly.
- Clean Up Spills Immediately: If you spill any sealant on the board or surrounding surfaces, clean it up immediately with a damp cloth. Once the sealant dries, it can be difficult to remove.
Conclusion
Sealing the edges of your Gypsum Board 5x5mm Square Hole is a simple but important step in ensuring the longevity and appearance of your project. By following the steps outlined in this guide and using the right materials, you can achieve a professional-looking finish that will protect your boards from moisture and damage.
If you're interested in purchasing Gypsum Board 5x5mm Square Hole or have any questions about sealing the edges, don't hesitate to reach out. We're here to help you with all your gypsum board needs.
References
- "Gypsum Board Installation Guide," National Gypsum Company
- "Sealants for Building Construction," ASTM International
Send Inquiry