

How to ensure the levelness of Suspended Ceiling Grid T24 MT33h CT25h during installation?
Aug 14, 2025
Leave a message
As a seasoned supplier of Suspended Ceiling Grid T24 MT33h CT25h, I've witnessed firsthand the importance of achieving a perfectly level ceiling grid during installation. A level ceiling not only enhances the aesthetic appeal of a space but also ensures the proper fit and functionality of ceiling tiles. In this blog post, I'll share some valuable insights and practical tips on how to ensure the levelness of Suspended Ceiling Grid T24 MT33h CT25h during installation.
Understanding the Basics of Suspended Ceiling Grid
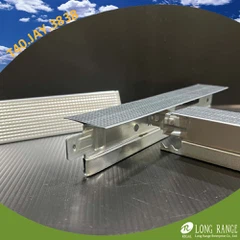
Before diving into the installation process, it's crucial to have a solid understanding of the components of a suspended ceiling grid. The Suspended Ceiling Grid T24 MT33h CT25h consists of main tees (MT), cross tees (CT), and hanger wires. The main tees run parallel to each other and provide the primary support for the grid, while the cross tees connect the main tees at regular intervals to form a grid pattern. The hanger wires are used to suspend the grid from the ceiling structure.
Pre-Installation Preparation
Proper preparation is key to ensuring a level suspended ceiling grid. Here are some essential steps to take before starting the installation:


- Measure the Space: Begin by measuring the length and width of the room where the ceiling grid will be installed. This will help you determine the number of main tees, cross tees, and hanger wires you'll need.
- Inspect the Ceiling Structure: Check the ceiling structure for any signs of damage or unevenness. If the ceiling is not level, you may need to make adjustments or use shims to compensate for the unevenness.
- Mark the Layout: Use a chalk line or laser level to mark the layout of the main tees and cross tees on the ceiling. This will help you ensure that the grid is installed in a straight and level manner.
- Gather the Necessary Tools and Materials: Make sure you have all the tools and materials you'll need for the installation, including a drill, screwdriver, pliers, measuring tape, chalk line, laser level, hanger wires, main tees, cross tees, and ceiling tiles.
Installing the Hanger Wires
The hanger wires are an essential component of the suspended ceiling grid, as they provide the support needed to keep the grid level. Here's how to install the hanger wires:
- Determine the Spacing: The spacing of the hanger wires will depend on the size and weight of the ceiling grid and tiles. As a general rule, the hanger wires should be spaced no more than 4 feet apart for light-duty applications and no more than 2 feet apart for heavy-duty applications.
- Mark the Hanger Wire Locations: Use a chalk line or laser level to mark the locations of the hanger wires on the ceiling. Make sure the marks are evenly spaced and aligned with the layout of the main tees.
- Install the Hanger Wires: Drill holes in the ceiling at the marked locations and insert the hanger wires. Use a pliers to bend the ends of the hanger wires into a hook shape and attach them to the ceiling structure. Make sure the hanger wires are tight and level.
Installing the Main Tees
The main tees are the primary support for the suspended ceiling grid, so it's important to install them correctly to ensure a level grid. Here's how to install the main tees:
- Cut the Main Tees to Length: Use a hacksaw or tin snips to cut the main tees to the appropriate length. Make sure the cuts are straight and clean.
- Attach the Main Tees to the Hanger Wires: Slide the main tees onto the hanger wires and use a screwdriver to attach them to the hanger wires using the provided clips or brackets. Make sure the main tees are level and aligned with the layout marks on the ceiling.
- Join the Main Tees: If you need to join two main tees together, use a tee connector to connect the ends of the tees. Make sure the connection is secure and level.
Installing the Cross Tees
The cross tees are used to connect the main tees at regular intervals to form a grid pattern. Here's how to install the cross tees:
- Cut the Cross Tees to Length: Use a hacksaw or tin snips to cut the cross tees to the appropriate length. Make sure the cuts are straight and clean.
- Attach the Cross Tees to the Main Tees: Slide the cross tees onto the main tees and use a screwdriver to attach them to the main tees using the provided clips or brackets. Make sure the cross tees are level and aligned with the layout marks on the ceiling.
- Check the Levelness: Use a laser level or a straightedge to check the levelness of the grid. If the grid is not level, make adjustments to the hanger wires or the main tees and cross tees as needed.
Using a Laser Level
A laser level is a valuable tool for ensuring the levelness of a suspended ceiling grid. Here's how to use a laser level to install a level ceiling grid:
- Set Up the Laser Level: Place the laser level on a stable surface in the center of the room and turn it on. Make sure the laser level is level and aligned with the layout marks on the ceiling.
- Align the Main Tees and Cross Tees: Use the laser level to align the main tees and cross tees with the laser line. Make sure the tees are level and parallel to the laser line.
- Check the Levelness: Use the laser level to check the levelness of the grid as you install the main tees and cross tees. If the grid is not level, make adjustments to the hanger wires or the tees as needed.
Common Mistakes to Avoid
Here are some common mistakes to avoid when installing a suspended ceiling grid:
- Not Measuring the Space Correctly: Failing to measure the space accurately can result in a grid that is too small or too large for the room. Make sure you measure the length and width of the room carefully and calculate the number of main tees, cross tees, and hanger wires you'll need.
- Not Using a Laser Level: A laser level is a valuable tool for ensuring the levelness of a suspended ceiling grid. Failing to use a laser level can result in a grid that is not level, which can cause the ceiling tiles to fit poorly or even fall out.
- Not Tightening the Hanger Wires: The hanger wires are an essential component of the suspended ceiling grid, as they provide the support needed to keep the grid level. Failing to tighten the hanger wires can result in a grid that sags or is not level.
- Not Aligning the Main Tees and Cross Tees: The main tees and cross tees should be aligned correctly to form a grid pattern. Failing to align the tees can result in a grid that is not level or that has gaps between the tiles.
Conclusion
Ensuring the levelness of a suspended ceiling grid during installation is essential for achieving a professional-looking and functional ceiling. By following the tips and techniques outlined in this blog post, you can ensure that your Suspended Ceiling Grid T24 MT33h CT25h is installed in a straight and level manner. Remember to take your time, measure carefully, and use the right tools and materials for the job. If you have any questions or need further assistance, please don't hesitate to contact us for procurement and negotiation. We're here to help you achieve the perfect ceiling for your space.
References
- "Suspended Ceiling Installation Guide." Armstrong Ceiling Solutions.
- "How to Install a Suspended Ceiling." The Home Depot.
- "Tips for Installing a Suspended Ceiling Grid." Lowe's.
In addition to the Suspended Ceiling Grid T24 MT33h CT25h, we also offer a wide range of other ceiling grid products, including Suspended Ceiling Grid T24 MT38h CT28h Jay Ends, Suspended Ceiling Grid T24 MT48h CT38h Jay Ends, and Suspended Ceiling Grid UT24 MT38h CT38h Jay Ends. If you're interested in learning more about these products or have any questions about our ceiling grid solutions, please don't hesitate to contact us. We're here to help you find the perfect ceiling grid for your project.
Send Inquiry