
How to install Gypsum Board 3x3mm Square Hole on a ceramic tile wall?
Jul 16, 2025
Leave a message
Hey there! I'm a supplier of Gypsum Board 3x3mm Square Hole, and today I'm gonna walk you through the process of installing this awesome product on a ceramic tile wall. Whether you're a DIY enthusiast or a professional contractor, this guide will help you get the job done right.
Why Choose Gypsum Board 3x3mm Square Hole?
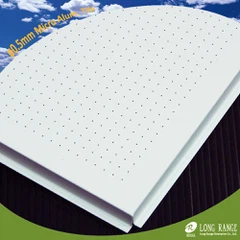
Before we dive into the installation process, let's talk a bit about why you should consider using Gypsum Board 3x3mm Square Hole. This type of gypsum board comes with a unique 3x3mm square hole pattern, which offers several benefits. Firstly, it provides excellent acoustic performance, helping to reduce noise and create a more comfortable environment. Secondly, the perforated design adds a touch of modern style to any space. And finally, it's relatively lightweight and easy to work with, making it a great choice for both residential and commercial projects.
Tools and Materials You'll Need
To install Gypsum Board 3x3mm Square Hole on a ceramic tile wall, you'll need the following tools and materials:
- Gypsum Board 3x3mm Square Hole: Of course, you'll need the board itself. Make sure to measure the area you want to cover and purchase enough boards to complete the project.
- Measuring Tape: This will help you accurately measure the wall and cut the gypsum boards to the right size.
- Utility Knife: A sharp utility knife is essential for cutting the gypsum boards.
- Trowel: You'll need a trowel to apply the adhesive to the wall.
- Adhesive: Choose a high-quality adhesive that is suitable for bonding gypsum board to ceramic tile.
- Screwdriver or Drill: You'll use this to attach the gypsum boards to the wall.
- Screws: Make sure to use the right size and type of screws for the job.
- Level: A level will help you ensure that the gypsum boards are installed straight and level.
- Sandpaper: You'll need sandpaper to smooth the edges of the gypsum boards after cutting.
Step-by-Step Installation Process
Now that you have all the tools and materials you need, let's get started with the installation process.
Step 1: Prepare the Wall
The first step is to prepare the ceramic tile wall. Clean the wall thoroughly to remove any dirt, dust, or grease. You can use a mild detergent and water to clean the wall, and then dry it completely. This will ensure that the adhesive bonds properly to the wall.
Step 2: Measure and Cut the Gypsum Boards
Next, measure the area of the wall where you want to install the gypsum boards. Use a measuring tape to get accurate measurements, and then transfer these measurements to the gypsum boards. Use a utility knife to cut the gypsum boards to the right size. Make sure to wear safety glasses and gloves when cutting the boards to protect yourself from any sharp edges.
Step 3: Apply the Adhesive
Once the gypsum boards are cut to size, it's time to apply the adhesive to the wall. Use a trowel to spread a thin layer of adhesive evenly over the area where you'll be installing the first gypsum board. Make sure to apply the adhesive in a zigzag pattern to ensure good coverage.


Step 4: Install the First Gypsum Board
Carefully place the first gypsum board on the wall, aligning it with the edges of the wall and making sure it's level. Press the board firmly against the wall to ensure that it adheres properly to the adhesive. Use a level to check that the board is straight and level, and make any necessary adjustments.
Step 5: Secure the Gypsum Board with Screws
After the first gypsum board is in place, use a screwdriver or drill to attach it to the wall. Insert the screws through the gypsum board and into the wall at regular intervals, making sure not to overtighten the screws. This will help to secure the board in place and prevent it from shifting.
Step 6: Repeat the Process
Continue the process of applying adhesive, installing gypsum boards, and securing them with screws until you've covered the entire wall. Make sure to leave a small gap between each board to allow for expansion and contraction.
Step 7: Finish the Edges
Once all the gypsum boards are installed, use sandpaper to smooth the edges of the boards. This will give the installation a professional finish. You can also use a joint compound to fill in any gaps between the boards and create a seamless look.
Step 8: Prime and Paint
Finally, it's time to prime and paint the gypsum boards. Apply a coat of primer to the boards to help the paint adhere better, and then let the primer dry completely. Once the primer is dry, you can apply your choice of paint to the boards to give them the desired color and finish.
Tips and Tricks
- Work in a Well-Ventilated Area: When working with adhesive and paint, make sure to work in a well-ventilated area to avoid inhaling any fumes.
- Take Your Time: Installing gypsum board takes time and patience. Don't rush the process, and make sure to follow each step carefully to ensure a successful installation.
- Use the Right Tools: Using the right tools for the job will make the installation process much easier and more efficient. Make sure to invest in high-quality tools that are suitable for the task.
- Get Help if Needed: If you're not comfortable working on your own, don't hesitate to ask for help. You can enlist the help of a friend or family member, or hire a professional contractor to assist you.
Contact Us for Purchasing
If you're interested in purchasing Gypsum Board 3x3mm Square Hole, we'd love to hear from you. We offer high-quality gypsum boards at competitive prices, and our team of experts is always on hand to answer any questions you may have. Whether you're a small DIY project or a large commercial installation, we can provide you with the products and support you need. So don't hesitate to contact us to discuss your requirements and get a quote.
References
- Gypsum Association. (2023). Installation Guide for Gypsum Board.
- Tile Council of North America. (2023). Ceramic Tile Installation Best Practices.
Send Inquiry