How to install Gypsum Board 3x3mm Square Hole on a plaster wall?
Dec 16, 2025
Leave a message
Hey there! I'm a supplier of Gypsum Board 3x3mm Square Hole, and today I'm gonna walk you through the process of installing this awesome product on a plaster wall. It might seem a bit daunting at first, but trust me, with the right steps and a little elbow grease, you'll have it up in no time.
Pre - installation Preparations
Before you even think about putting up that gypsum board, you gotta do some prep work. First off, measure the area of the plaster wall where you plan to install the board. Make sure to measure accurately, 'cause if your measurements are off, the board might not fit right. You can use a tape measure to get the length and height of the wall section.
Next, gather all the tools you'll need. You'll need a utility knife to cut the gypsum board if needed, a drill with the right bits for making holes, screws or nails to attach the board to the wall, a level to make sure the board is straight, and a stud finder to locate the wall studs. Wall studs are those vertical wooden or metal beams behind the plaster wall, and they're super important for providing a solid attachment point for the gypsum board.
Cutting the Gypsum Board
Once you've got your measurements, it's time to cut the Gypsum Board 3x3mm Square Hole to size. Lay the board on a flat surface. If you need to make a straight cut, use a straightedge and a utility knife. Score the front of the board along the cutting line a few times until the paper and the gypsum core are cut through. Then, carefully bend the board along the scored line. The board should break cleanly along the line. If you need to make a curved or irregular cut, you can use a jigsaw. Just make sure to wear safety goggles when using power tools.
Locating Wall Studs
Now, it's time to find those wall studs. Use a stud finder to scan the plaster wall. Most stud finders work by detecting changes in density behind the wall, which indicates the presence of a stud. Mark the location of the studs with a pencil. You'll want to attach the gypsum board to the studs for a secure installation. The studs are usually spaced 16 or 24 inches apart, but it's always best to double - check.
Attaching the Gypsum Board
Start by positioning the cut gypsum board against the plaster wall. Use a level to make sure it's perfectly horizontal and vertical. Once it's in the right position, you can start attaching it to the wall. If you're using screws, pre - drill holes in the board at the locations where you'll be attaching it to the studs. This helps prevent the board from cracking. Then, drive the screws into the studs through the holes in the board. Make sure the screws are on the flat part of the board and not in the square holes.
If you prefer to use nails, you can use a nail gun or hammer nails into the studs through the board. Space the nails or screws about 8 - 12 inches apart. As you work your way up the board, keep checking with the level to ensure it stays straight.
Joining Multiple Boards
If you need to install multiple gypsum boards side by side or on top of each other, you'll need to join them properly. For side - by - side boards, make sure the edges are butted together tightly. You can use joint tape and joint compound to cover the seam. First, apply a thin layer of joint compound over the seam. Then, press the joint tape into the compound and smooth it out. Apply another layer of joint compound over the tape and let it dry. Sand the dried compound until it's smooth.
When joining boards vertically, you can use a similar process. Just make sure the joints are staggered, so they don't line up with each other. This makes the installation stronger and more stable.


Finishing Touches
After all the boards are installed and the joints are finished, you can give the gypsum board a final sanding. Use fine - grit sandpaper to smooth out any rough edges or bumps. This will give the surface a nice, even finish. You can then paint the gypsum board or apply other finishes according to your preference.
Why Choose Our Gypsum Board 3x3mm Square Hole
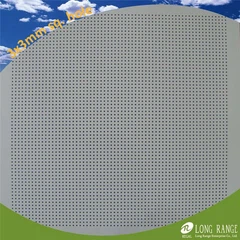
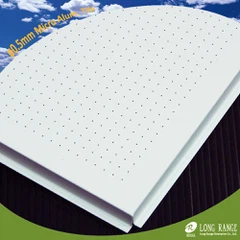
Our Gypsum Board 3x3mm Square Hole is made of high - quality materials. The 3x3mm square holes not only add a unique aesthetic look but also have practical benefits. They can improve the acoustics of a room, allowing sound to pass through and be absorbed, which is great for home theaters, studios, or any space where sound quality is important.
The board is also easy to work with, as you've seen from the installation process. It's lightweight, so it's easy to handle and transport. And it's durable, so it will last for a long time.
Let's Talk Business!
If you're interested in purchasing our Gypsum Board 3x3mm Square Hole, don't hesitate to reach out. We're here to answer any questions you might have about the product, the installation, or pricing. Whether you're a contractor working on a big project or a DIY enthusiast doing a small home improvement job, we've got the right solution for you.
References
- "Home Improvement Handbook": This handbook provides general guidelines on various home improvement tasks, including wall installations.
- "Gypsum Board Installation Guide": A guide specifically focused on the installation of gypsum boards, which was very helpful in preparing this blog post.
Send Inquiry