How to measure for Suspended Ceiling Grid T24 MT33h CT25h installation?
Jul 10, 2025
Leave a message
Hey there! As a supplier of Suspended Ceiling Grid T24 MT33h CT25h, I've had my fair share of helping folks figure out how to measure for installation. It might seem like a daunting task at first, but with the right guidance, you'll be well on your way to a successful ceiling grid setup. So, let's dive right in and break down the measurement process step by step.
Understanding the Basics
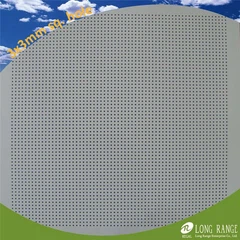
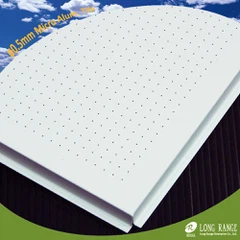
Before we start measuring, it's important to have a basic understanding of what we're dealing with. The Suspended Ceiling Grid T24 MT33h CT25h is a popular choice for many commercial and residential projects. The "T24" refers to the width of the main tee, which is 24mm. The "MT33h" and "CT25h" are specific types of tees that make up the grid system. This grid is designed to support ceiling tiles and create a clean, professional look.
Preparing for Measurement
First things first, gather all the tools you'll need. You'll want a good tape measure, a pencil, a level, and some graph paper to sketch out your measurements. It's also a good idea to wear safety goggles and gloves, especially if you're working in a construction environment.
Measuring the Room
The first step is to measure the length and width of the room where you'll be installing the ceiling grid. Start by measuring the longest wall in the room. Use your tape measure to get an accurate measurement from one end of the wall to the other. Write this measurement down on your graph paper. Then, measure the width of the room at its widest point. Again, write this measurement down.
It's important to measure the room in multiple places, especially if the walls aren't perfectly straight. This will help you account for any irregularities in the room's dimensions. For example, if one side of the room is slightly wider than the other, you'll need to adjust your grid layout accordingly.
Accounting for Obstacles
Next, look around the room for any obstacles that might affect the installation of the ceiling grid. This could include light fixtures, ventilation ducts, or pipes. Measure the distance from the wall to each obstacle and note their locations on your graph paper. You'll need to make sure that the grid is installed in a way that allows for easy access to these obstacles for maintenance and repairs.
Determining the Grid Layout
Once you have the room measurements and have accounted for any obstacles, it's time to determine the grid layout. The goal is to create a grid that is evenly spaced and centered in the room. Start by dividing the length and width of the room by the width of the main tee (24mm). This will give you an idea of how many main tees you'll need in each direction.
For example, if the length of the room is 6000mm and the width of the main tee is 24mm, you'll need 250 main tees in the length direction (6000 ÷ 24 = 250). Do the same calculation for the width direction.
It's important to note that you may need to adjust the number of main tees slightly to account for any odd measurements or to ensure that the grid is centered in the room. You can do this by adding or subtracting a tee here and there.
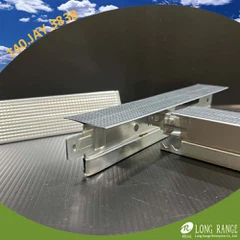
Measuring for Cross Tees
After determining the number of main tees, you'll need to measure for the cross tees. Cross tees are used to connect the main tees and create a stable grid structure. The spacing between cross tees will depend on the size of the ceiling tiles you'll be using.
Typically, cross tees are spaced at intervals of 600mm or 1200mm. Measure the distance between the main tees and mark the locations where the cross tees will be installed on your graph paper. Make sure that the cross tees are evenly spaced and perpendicular to the main tees.
Checking for Level
Before you start installing the ceiling grid, it's crucial to check that the room is level. Use a level to check the walls and the floor of the room. If the room is not level, you'll need to make adjustments to the grid installation to ensure that the ceiling is straight and even.
Using Our Related Products
If you're interested in exploring other options for your suspended ceiling grid, we also offer Suspended Ceiling Grid T24 MT38h CT38h Jay Ends and Suspended Ceiling Grid T24 MT38h CT28h Jay Ends. These products have similar features to the T24 MT33h CT25h but with some slight variations in the tee design. Additionally, our Suspended Ceiling Grid UT24 MT38h CT38h Jay Ends is another great option for those looking for a high-quality suspended ceiling grid.
Finalizing the Measurements
Once you've completed all the measurements and determined the grid layout, double-check your work. Make sure that all the measurements are accurate and that the grid layout makes sense. It's a good idea to have someone else review your measurements and layout to catch any mistakes.


Contact Us for Purchase and Consultation
If you're ready to start your project and need to purchase the Suspended Ceiling Grid T24 MT33h CT25h or any of our other related products, we're here to help. Our team of experts can assist you with any questions you may have about the installation process or the products themselves. Whether you're a professional contractor or a DIY enthusiast, we have the knowledge and experience to ensure that your project is a success.
References
- Construction Manual for Suspended Ceiling Systems
- Guide to Measuring and Installing Ceiling Grids
So, there you have it! Measuring for the installation of the Suspended Ceiling Grid T24 MT33h CT25h isn't as complicated as it might seem. By following these steps and taking your time, you'll be able to get accurate measurements and create a beautiful, functional ceiling grid. If you have any more questions or need further assistance, don't hesitate to reach out. We're here to make your ceiling installation project a breeze!
Send Inquiry